

This article will demonstrate how to configure and use the Spring Session to manage session data in a web application with Spring Boot. For a more in-depth look at the code, check out this GitHub repository.
Introduction
In a web application, user session management is crucial for managing user state. Spring Session is an implementation of four approaches, storing session data in a persistent data store. Spring Session supports multiple datastores, like RDBMS, Redis, HazelCast, MongoDB, etc., to save the user session data.
Spring Session Benefits
- Spring Session decouples the session management logic from the application, making it more tolerant.
- Spring Session keeps information in the database, so it’s great to use it in a clustered environment with multiple server nodes. Because of this, we don’t need to rely on the sticky session or session replication logic.
- As session data is stored in the database, user session data is not lost if the application crashes. When the application started again, it picks up the user session from the database.
- It is easy to switch between session storage. Just by changing the configuration, we can switch from using JDBC to Redis.
Create Your Spring Boot Application
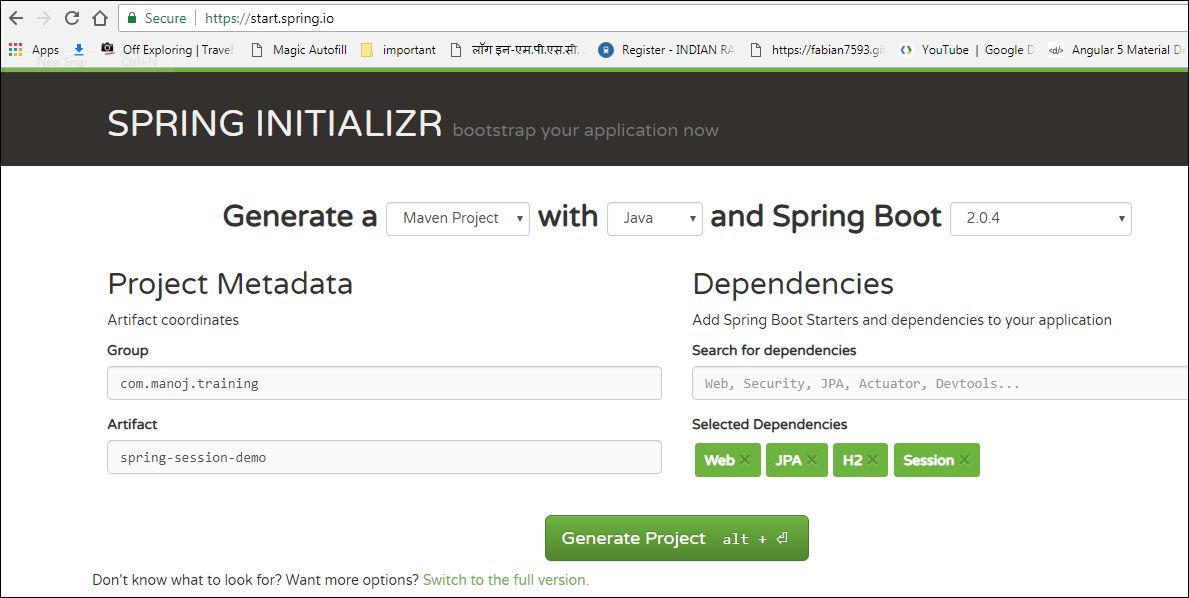
Let’s start by creating a simple Spring Session JDBC example, using the latest version, with Web, Security, JPA, H2, and Session starters. I have used the Spring Initializer to generate the project.
By default, the Spring starter will add the
org.springframework.session:spring-session-core dependency. Let us change it to spring-session-jdbc, as we are going to use JDBC backend.Configure Spring JDBC Session Properties
The
application.properties file specifies the H2 database configuration and Spring Session attributes.
We added the property
spring.session.store-type=jdbc. Here, we specify using JDBC to store the session data.
As we are using the H2 in-memory database, Spring Session creates the following tables required to store the session data automatically from the script:
But, if we are going to another RDBMS database, such as My SQL, then we need to add the My SQL dependency.
And add my SQL database configuration in the application.properties file
Enable the Spring Session table creation using the
spring.session.jdbc.initialize-schema property.
With this property, Spring will try to create the session tables using the script
classpath:org/springframework/session/jdbc/schema-@@platform@@.sql. So, in this case, it will use schema-mysql.sql
If we specify
spring.session.jdbc.initialize-schema=never, then we need to create session tables in manually executing the script. In production, we don't enable the auto-create/update.Spring Session With Spring Security
We are using Spring Security for user authentication. Therefore, we are integrating Spring Session with Spring Security.
Let's add the Spring Security to our application:
Now, we create the
SpringSecurityConfig class to enable the Spring Security.@EnableWebSecurity enables the Spring Security in our application. Here, we have configured two users, User1 and Admin, in the configure method.Create the RestController
Here, we will create a
HelloController class. We are going to expose the hello REST endpoint, it will return "Hello World."SpringBootApplication class:
The
@EnableJdbcHttpSession annotation creates a Spring Bean with the name of springSessionRepositoryFilter that implements the filter. The filter is what is in charge of replacing the HttpSession implementation to be backed by Spring Session. In this instance, Spring Session is backed by a relational database. By default, the session timeout is 1800 seconds (30 minutes).
Now, if we run our Spring Boot application and access http://localhost:8080/hello, it should redirect to an auto-generated login page. Now, login with the configured users and see the data in the
SPRING_SESSION table. You can see that the login username is stored in the PRINCIPAL_NAME column.
Below is a video that shows the working demo of the application.
Summary
In this article, we learned how we can manage user session effectively by using Spring Session with very minimal configuration with the Spring Boot auto-configuration. We can easily change the backend from JDBC to Redis or HazeCast just by simply changing the configuration.
If you have anything that you want to add or share, then please share it in the comment section below.
Happy Learning!


No comments:
Post a Comment